Painting glass is an inexpensive, easy craft. Seriously easy. And ridiculously inexpensive. But if you’ve never done it before, it can be a little intimidating.
A while ago my Mom had asked her adult children, their spouses, and her grandkids to each paint a 4″ square ceramic tile so that we could provide a homemade tile countertop for an outdoor bar. Mom asked that we consider going to a paint-your-own-pottery place.
Now I love those places, but they can get expensive. I gleaned a tip from Pinterest that said you can buy the ceramic tiles from Home Depot or Lowe’s for $0.16. So that’s what I did. Next I found the kinds of paints needed for the project at Michael’s.

Folk Art Enamel Acrylic Paint for Glass and Ceramics
The box of Folk Art paints was purchased at Michaels for $17.99, minus a 40% coupon ($10.79). It has a great variety of paint colors and includes directions on the back for how to heat set.
First I had the kids paint some tiles, then I got my siblings and our spouses to sit down, drink wine, and paint two tiles.


It was fun, easy, and quick. Here’s what we learned:
- Have a bottle of rubbing alcohol handy. First use it to clean / prep the surface. Then if you make any mistakes, you can either use a q-tip with rubbing alcohol to erase or simply wipe it clean and start again.
- Other supplies needed: paint brushes, paper towels, newspaper (or other drop cloth), water to clean brushes.
- Wine is optional.
The instructions suggest either air dry for 21 days or air dry for 1 hour, then place in a cool oven, bake for 30 minutes at 350 degrees, and cool in oven. Heat setting was pretty easy, especially if you let it cool in the oven overnight. Start out in a cool oven so that the items slowly get hotter and won’t break. Start the timer for 30 minutes once the oven comes to temp. Then turn the oven off and let the items slowly cool (so they won’t break).
It was so easy that I decided to try painting on glass. I purchased a few matching pairs of small glasses from the Dollar Tree and painted a couple of glasses for my kids, I approach painting like glorified coloring. I stick to basic shapes and patterns.

Lego Glasses painted on Irish Coffee Mugs

Train and Rocket painted on glass mugs
I chose these size glasses because they are appropriate portions for my kids.
Getting the glasses from the Dollar Tree meant that the glass itself was thicker and sturdy. And they were inexpensive… if they turned out looking crappy, I wouldn’t be devastated,
Since the paints aren’t food safe, it’s recommended that you avoid painting along the top lip of the glass.
After heat-setting, the glasses are top rack dishwasher safe.
The kids loved them! Coincidentally, the same Christmas I gave these glasses to my boys, my sister-in-law gifted our family with a set of drinking glasses from Uncommon Goods:

These are adorable! The instructions recommend handwashing, but note they may be ok for top rack dishwasher. Well, between wooden cutting boards, good knives, pots and pans, and special platters, I don’t have room in my life for more things that aren’t dishwasher safe. So I decided to try the dishwasher…and 3 out of 4 glasses were fine. But the decal on the 4th glass (my younger son’s) half peeled off. And he was devastated. While trying to figure out whether to spend $12 for a replacement glass, plus shipping, I accidentally knocked my older son’s glass off the counter and shattered it on the tile floor.
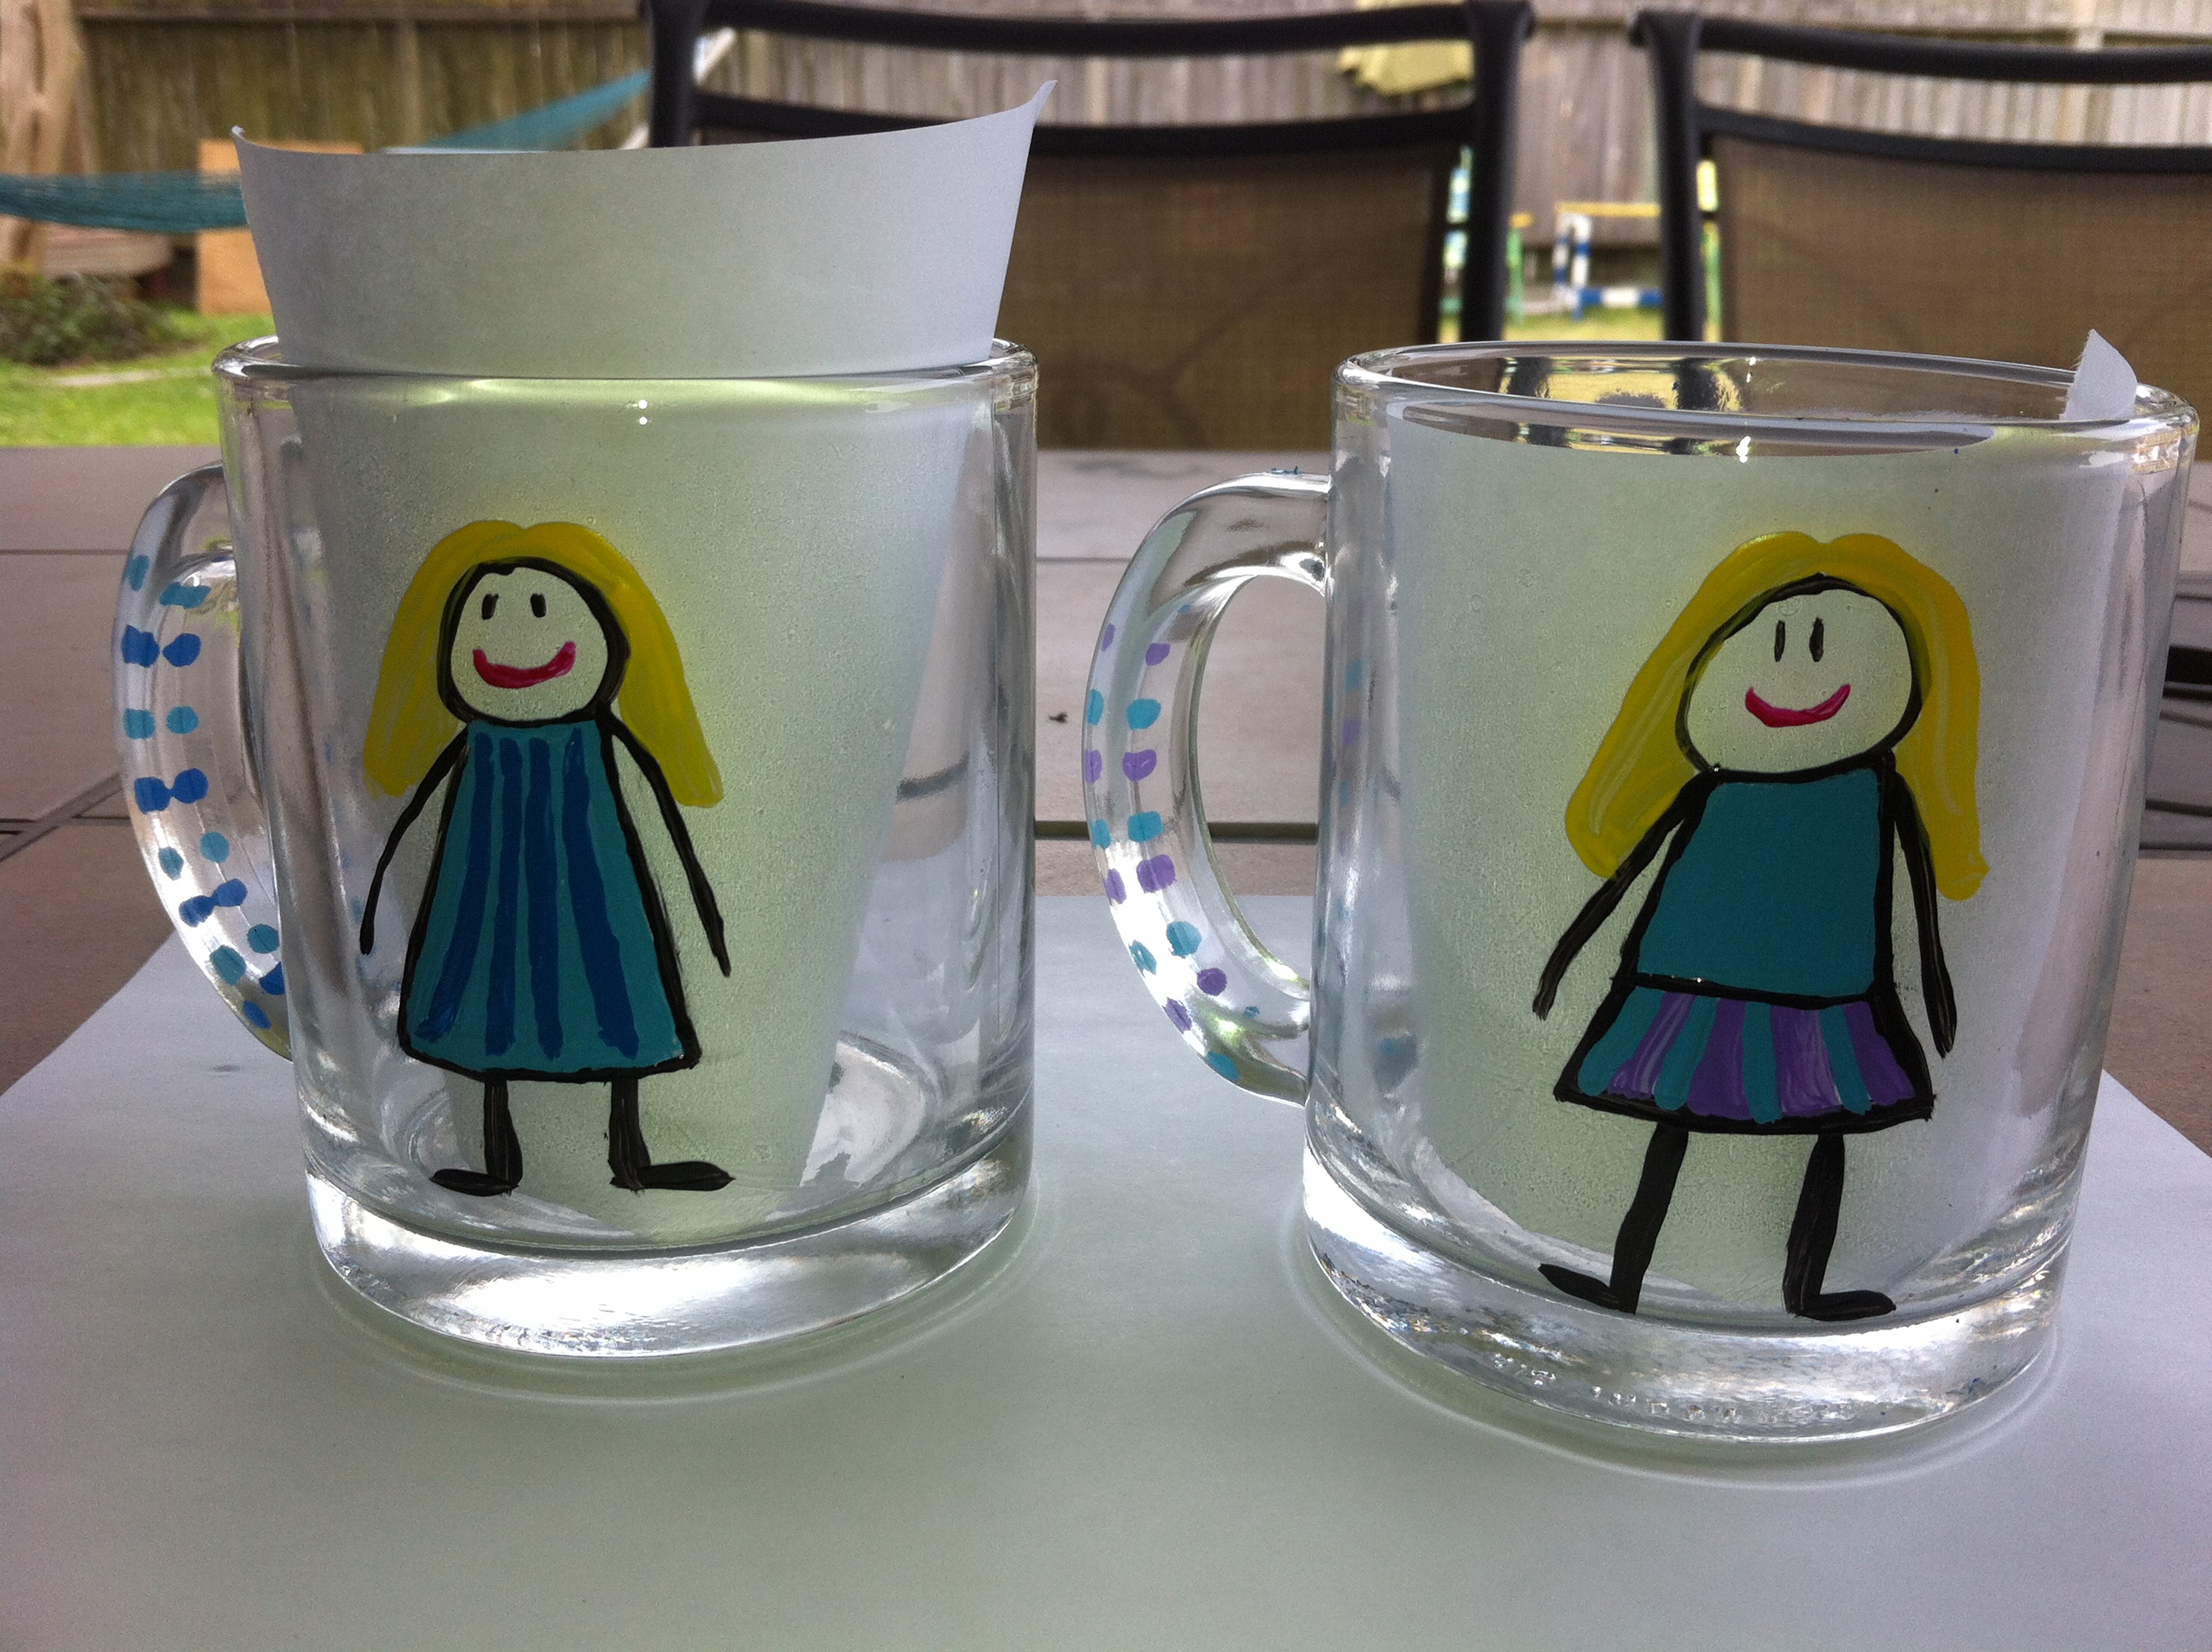
So that night, after FaceBooking my parenting fail, I grabbed two glasses from our cabinet and attempted to paint our own “Family Glassware.” A very helpful tip here is: sketch out the drawing on a piece of paper, tape it to the inside of the glass, and then trace over it in paint.

Homemade “Family Glasswares”
The kids loved them! In fact, I decided to start painting glorified stick figure glasses as birthday presents for my friends’ kids.

I’ll ask their Mom’s what their favorite colors are, and paint their clothing accordingly… along with hair the appropriate color and style,
When painting glass, the same tips apply:

Use rubbing alcohol to clean the surface of the glass.
- Use rubbing alcohol to clean / prep the surface. Then if you make any mistakes, you can either use a q-tip with rubbing alcohol to erase or use a paper towel with rubbing alcohol to simply wipe it clean and start again.
- Other supplies needed: paint brushes, paper towels, drop cloth, and water to clean brushes.
- Heat-set the glassware the same as ceramic: either air dry for 21 days or air dry for 1 hour, then place in a cool oven, bake for 30 minutes at 350 degrees, and cool in oven.
- Since the paints aren’t food safe, avoid painting along the top lip (1/4″ to 1/2″) of the glass.
- Wine is optional.
To help prevent the paint from chipping or peeling in the dishwasher, I have started to seal my painted creations with a clear medium. There is a bottle included in the Folk Art kit I referenced above, but if you buy containers of the acrylic paint separately, consider getting this as well.
I’ve had such success with painting glasses that I decided to paint a slew of them for my son’s Lego birthday party favor:

First I printed a copy of the mini-fig head I would paint, and cut it out.

Then tape it to the inside of the glass.

Then trace the border with the outline color (black) paint.

Finally, fill in the rest of the color and design. And paint the “clear medium” to seal it in before heat setting.
I purchased these glasses from IKEA. The GODIS glasses were $6.99 for a 6 pack of 8 oz glasses, which made for a party favor costing just over $1 per kid. I painted their names on the glasses as well, which all the kids loved.
You can easily print and trace whatever design for whatever themed glassware you’d like. For instance, superheros:

Or instead of glassware paint a vase…

So it’s up to you! What kind of Creative Solution will you create with painting glass and ceramics?